2017년 1월 24일 화요일

2-2 Dimension Align

Dimension Align?
 The dimension line alignment feature offers a variety of alignment types to help you avoid manual manipulation due to dimensions.


A. 'Dimension Align' Location


B. Learn about options


C. How to use
 First click the basic dimension, then select the dimension you want to apply and run it. You can set the dimension line spacing.


2-1 Linear : Automatic dimension position adjustment

Linear ?
 Applies vertical, horizontal, and alignment types automatically based on line type. It is related to the function of 'MechClick'.


A. 'Linear' Location


B. How to use
 The dimension type is automatically applied according to the type of line.


You can use the shortcut keys to pin the type you need.

1-1 Dimension Option : Right mouse click

Dimension Option?
 Dimensioning function of 'MechClick' provides optional function. When the right mouse button is clicked, an option window is displayed, and the character function, tolerance function, precision unit setting, and dimension type to be written as dimensions are provided. Each dimension function has a different dimension type.


A. Dimension Option
 You can activate the dimension options window by right-clicking on it before defining the dimension function fully.


1) Characters: Attached characters can be specified at the time of dimension writing. In
                     addition, options such as font and color can be specified.


2) Tolerance: fit tolerance, general tolerance can be applied.
   

3) Unit: You can specify the precision of the dimension and can suppress 0.
            (0.5 > .5 / 1.50 > 1.5)


4) Dimension type: There is different type for each dimension, and you can also specify the
                            dimension layer.


B. How to use
 You can activate the dimension options window by right-clicking on it before defining the dimension function fully.


4-1 Export Part List : Text File, Excel File

Export Part List 
 Export Parts Use the list to export the BOM created in the drawing to an EXCEL file. You can specify Excel's rows and cells directly.


A. 'Export Part List' Locate


 B. 'Export Part List' Interface


 a. Drawing area name: You can select the drawing area to be documented.
 b. Work sheet name: Enter the sheet name of the Excel work sheet.
 c. Document start cell (row): Enter the start cell (row) where the bill of materials will start.
 d. Save Location: Select the Excel file to save.
 e. Title display: Select whether to display the title when converting.
 f. Bill of materials specification: You can specify the position of the cell when exporting Excel.


 C. Using 'Export Part List'
If you specify the cell and row location according to the purchase order form, you can complete the purchase order without any additional work.

(You can set it in the BOM Table spec option.)


<Reference>


3-4 Convert Part List : Use Existing Parts List

Convert Part List?
 You can convert the previously created table to use all editing functions of 'MechClick' by applying the 'Part conversion table' function. 


A. 'Convert Part List' Locate


B. How to use 'Convert Part List' 1


 a. First point: Select the bottom left corner except for the title.
 b. Second point: Select the upper right corner, which is the last part of the BOM.
 c. Third point: Select the point directly above the first point to set the row height of the bill
                      of materials.


 C. How to use 'Convert Part List' 2

      
(Change the column according to the title order of the existing parts list.)


  DHow to use 'Convert Part List' 3

(The converted content can also be entered as part number.)


3-3 Edit Part information(Edit Directly) : Real-time interworking

Edit Part information(Edit Directly)?
 Unlike Bill of Materials editing, direct editing of part information can be modified by directly selecting the part number to be edited.
 Because it can be linked with the bill of materials in real time, it is often used for single item modification.


A. Edit Part information(Edit Directly)


 B. Example of using the part information direct edit window


3-2 Edit Part Information List : Real-time interworking


Edit Part Information List?
For editing, you can link to the BOM in real time. However, if you add or remove part information, you must regenerate the BOM to reflect the changes.


A. 'Edit Part Information List' Locate


 B. Edit Part Information List : Real-time interworking


When you edit part information in the 'Edit Part Information List', the BOM table also changes.


C. Edit Part Information List: Add or Remove Parts


If you add part information, the table is not displayed immediately. When removing part information, blank space is generated as shown in the figure.


D. Edit Part Information List: Regeneration


(Rebuild by adding a BOM.)


3-1 Create Part List : Freely to set format / Sharing Forms

Create Part List?
 When you create a BOM, all the information and tables are automatically created.
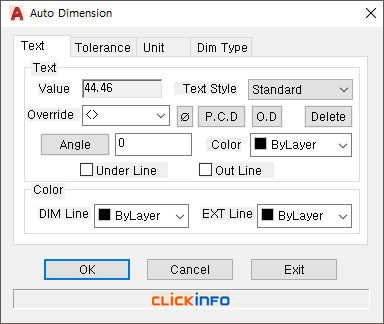
You can also use table options to manually adjust the spacing and color of the table, the size and color of the text.


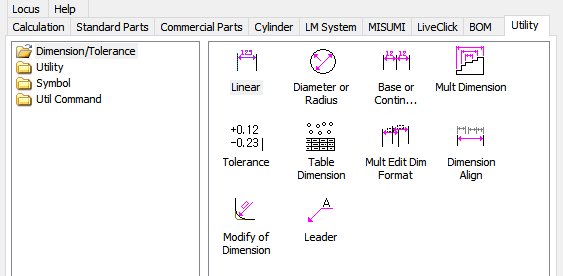
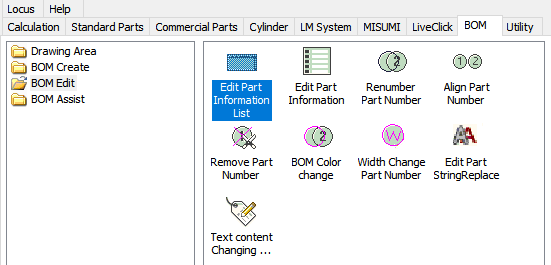
A. 'Create Part List' Locate


B. 'Create Part List' interface


1) Drawing Area : You can select the drawing area in which to create the BOM. By centering the drawing area on the screen, you can easily track it automatically.

2) Select All : When 'Select All' is checked, a bill of materials is created for all the data in the area. If you click the Select Part Number button after deselecting the entire selection, the user selects the required part number and creates it as a bill of materials.

3) draw order: draw order is sorted in ascending or descending order.

4) Max Line : If you have a lot of parts information, you can control the maximum number of lines and create a separate parts list.

5) Display Title : Select whether or not to create a title when creating a part list.

6) Table spec : You can save and import the table by setting interval and color of table, size and color of character, and you can also directly select cell designation when converting Excel of parts table.


C. Example of Creating a Bill of Materials


2-6 Renumber Part Number : Automatic sorting

Renumber Part Number?

If the order of parts in the BOM table is twisted, 'RENUMBER PART NUMBER' automatically reorders the order. You can also easily add mark changes, prefixes, etc. to specific part numbers.


A. Reunmber Part Number Locate


B. Reunmber Part Number Interface


 1) Part number: You can rearrange the format that you set by entering the prefix and number as                          an incremental value.
 2) Type: You can set the font and height of the text.
 3) BOM Mark: You can specify the desired BOM Mark.
 4) BOM selection: Full selection and individual selection are possible.


2-5 Remove Part Number

Remove Part Number?
In addition to deleting the part number, the information of the part registered in the drawing is completely removed from the drawing.

※ It is possible to erase the part number using AutoCAD's 'ERASE' command. However, in this case, since the part information is not gone, the part data is considered to exist in the drawing and will be continuously influenced at the time of 'BOM operation'.


A. Run "Remove Part Number"


B. How to Remove a Part Number

①  Execute 'Remove BOM' command.


② Select the part number to be removed with the left mouse button and press ENTER or click the right side of the mouse.

2-4 Edit Part Information(Edit Directly) : eduplication

Edit Part Information?
If you create a part number using information from a meclick or in-house product, the number may overlap. You can use this function to delete duplicate part numbers in batch.


 A. Edit Part Information locate


To use the part information direct editing, the part number must be generated first.


B. Edit part information Learn more


 When you select a part number, the corresponding part number window is created. From this window, you can delete duplicate numbers and modify part information.


2-3 Alian Part Number

Alian Part Number?
When you are working on a drawing, there are many cases where the part numbers are entangled. In this case, the part number sort function makes it easier to sort part numbers.
Please note that the part numbers are not aligned properly when using 'stretch' function of CAD.


A. Alian Part Number Location


B. How to use Alian Part Number


* Shortcut key

1) SHIFT: Vertically and horizontally aligned.

2) (S): You can set the interval of the part number.


2-2 Edit Part Information List : Information, number generation

Edit Part Information List?
When creating the part number, the information is created in the 'Edit Part Infomation List' window. It is possible to process general part information such as edit and creation of part information. BOM (bill of materials) can be linked with real time when editing information.


A. Edit Part Information List Location


B. Part Information List


You can rearrange the part numbers in the upper right corner and change the order using the UP and DN buttons.


* Function description for each button

1) BOM Mark: You can create the part number corresponding to the selected part.

2) Edit: You can edit the information of the selected part.

3) Remove: Removes the information of the selected part.

4) Bill of materials specification: You can specify the bill of materials form.


*You can edit the table directly according to your company's specifications.
  Click the "Export" button to share the format with the designer.


5) ADD (A): Pressing shortcut key A will pop up a window where you can create part information.


This function is one of the most frequently used functions when creating parts list of in-house parts because you can generate part number from part information input.